
A token board can be a very effective tool for behavior management in kindergarten, particularly for students with specific behavior goals. The way you put together this system can have a huge impact on its effectiveness. In this post, I’m going to share tips for how to set up a token board system for individual students in kindergarten.

How to Set Up a Token Board System
Once you’ve decided that a token board would be appropriate for an individual student in your classroom, it’s time to set up the system! There are a few must-haves when you’re setting up a token board so here are some tips to help you get started:
1. Select a Goal
Before you assemble the token board system, it’s important to think about the behavior you’ll be targeting with the system. It should be a positive behavior that the student is capable of demonstrating at a high enough frequency that they can fill in the token board in an appropriate amount of time.
2. Choose a Board
Once you have an idea of the behavior you’re targeting and where the student is starting from with that behavior, you can choose a token board format that would be appropriate for the individual student.
You might choose a board that has space to earn three tokens if it’s a behavior that the student doesn’t exhibit very often. If the student is able to exhibit the behavior more often, you might use a board with space to earn ten tokens. (I have created a set of token board printables with many different board options, so it’s easy to find the one that works best for your student. I’ll share more about that resource at the end of the post.)
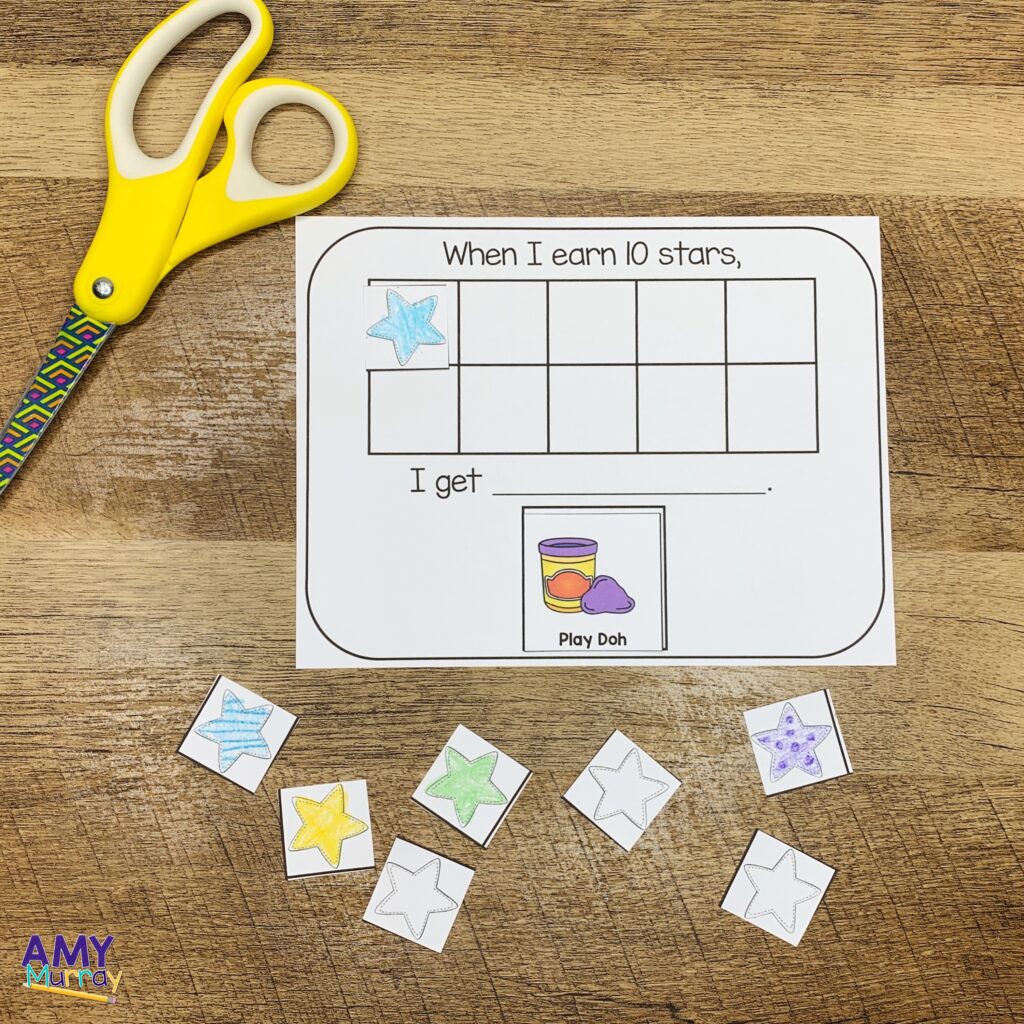
3. Create Tokens
The next step is to create the tokens that your student will use to fill in the chart. Stars are always a great choice, but you can personalize the tokens to make them even more motivating for the student to earn.
One of the easiest ways to create personalized tokens is with stickers! Find a character or theme that your student loves and put the stickers onto plain paper or cardstock (this will make them a little more durable). Then you just need to run the stickers through the laminator and cut them into individual tokens. Be sure to make more than you’ll need, because you will inevitably lose as the year progresses.
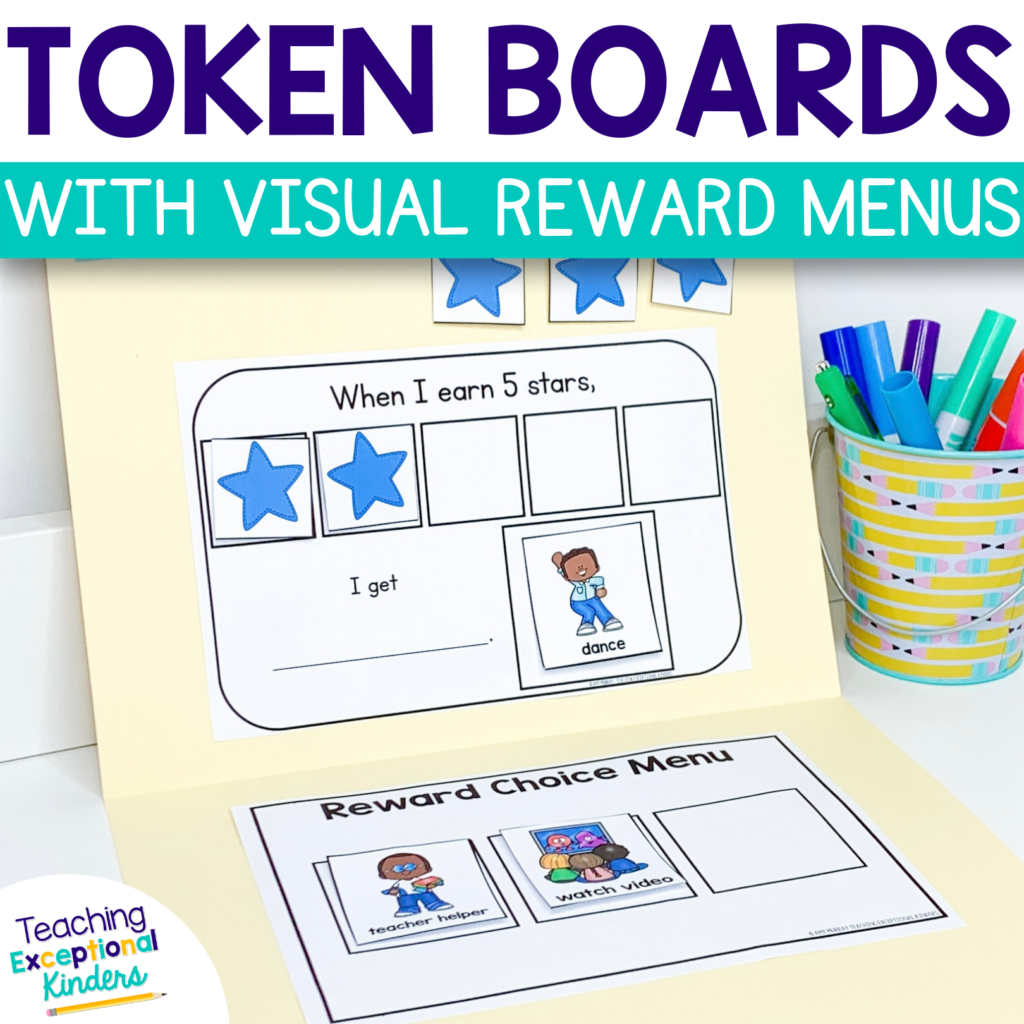
4. Prepare a Reward Choice Menu
The next important component of a token board system you’ll want to prepare is the reward choice menu. These are rewards that the student will earn once they have filled up the token board. There should be at least three rewards for the student to choose from, with two of those being highly desirable for the student. (It’s not really a choice if there is only one thing on the list that the student actually wants.)

The other thing to consider when preparing the reward menu is that the choices should be things that you can easily provide to the student within an appropriate amount of time. It’s not ideal for the student to wait until the next day to receive the reward. This can have a very negative impact on student buy-in for the token board. You’ll also want to make sure you have all of the supplies needed for a reward before you add it to the choice menu.
5. Assemble the Folder
Once you have all of the pieces ready to go, it’s time to assemble the folder! I like to use a folder for a token board system because it can easily travel with the student. This makes it easier for the student to generalize the skills they’re practicing! Plus, when the folder is closed, no one can tell what it is, which is more considerate of student confidentiality.
The first step in prepping the folder is to add the student's name on the outside of the folder. You could also have the student decorate it, if they’d like. Then, you can attach your chosen boards to the inside of the folder, with the token board frame on one side and the reward menu frame on the other.

Once the folder has been prepped, you can run it through the laminator. Not only does this make the token board more durable, but it also means you can use a dry-erase marker to write the student’s goal at the top of the token board. You'll also want to laminate the individual reward cards and tokens separately while you have the laminator warmed up. Once everything's prepped, you just need to add Velcro dots to the folder to hold the tokens and reward choices. That's it!
More Tips for Using Token Boards
Once your token board is set up, it’s time to put it to use! I’ve put together a video guide for using token boards in kindergarten. You can see the set-up tips from this post in action, as well as additional tips for implementing token boards in the classroom.
Printable Token Boards for Behavior
Creating an individual behavior management system doesn’t have to be time-consuming! As I mentioned in this post, I’ve created a resource that makes it so much easier to create token boards for your students!
These printable boards are intended to be used with individual students. Due to this, here are many different options to help you create a personalized behavior management system for your students who need this level of support. They are meant to be low-prep, so all you need to do is print, laminate, and add some Velcro.
If you’d like to take a closer look at everything included in this printable set of token boards, you can find it in the Teaching Exceptional Kinders shop or in my TPT store.
Save These Tips for Setting Up a Token Board System
Be sure to save this post so you can come back to it later! Just add the pin below to your favorite Pinterest board of behavior management ideas. You’ll be able to quickly find these tips and resources when you’re ready to set up a token board system.
