

Kindergarten is such a special place for many reasons but often the most unique part of the grade level is the variety of different ability levels of the students at the start of the year. Some students come to school with lots of background knowledge and some are able to read. Others come to school with limited (or no) school experience and they are not even able to recognize their name in print.
The variety of ability levels presents unique challenges to kindergarten teachers. Using classroom visuals is a simple way to level the playing field for ALL of the learners in your kindergarten classroom. Labeling classroom items with student photo stickers is a great visual to support all students.
Why do I need photo stickers in my classroom?
My favorite classroom visual was labeling items and spaces with student photographs. Using student photos to label things like cubbies, name tags, folders, etc. allow all your students to identify who something belongs to without having to read.
Does this mean I don't encourage students to learn how to read their names? No. We still practice reading, writing, and spelling names. After all, it's a critical life skill. Adding a picture to a cubby name tag doesn't prevent a child from learning to read their name. It simply assists them in finding their space.

There are many other ways to practice reading and writing names. You can set up center activities, work in small groups, name writing worksheets, etc. The photographs are simply an assistant that allows all of your students to have the same access to classroom materials.
Another benefit of labeling with photographs is that it makes life easier for substitutes or support staff who may not know everyone's names. They can still assist in finding belongings.
How to create Student Photograph Labels
So, how can you easily label things with student photos? I print a class set of photos on sticker labels and use those throughout the year.
- First, take a photo of each of your students. I always did this the first day of school (or at least the first week) so I could label things quickly.
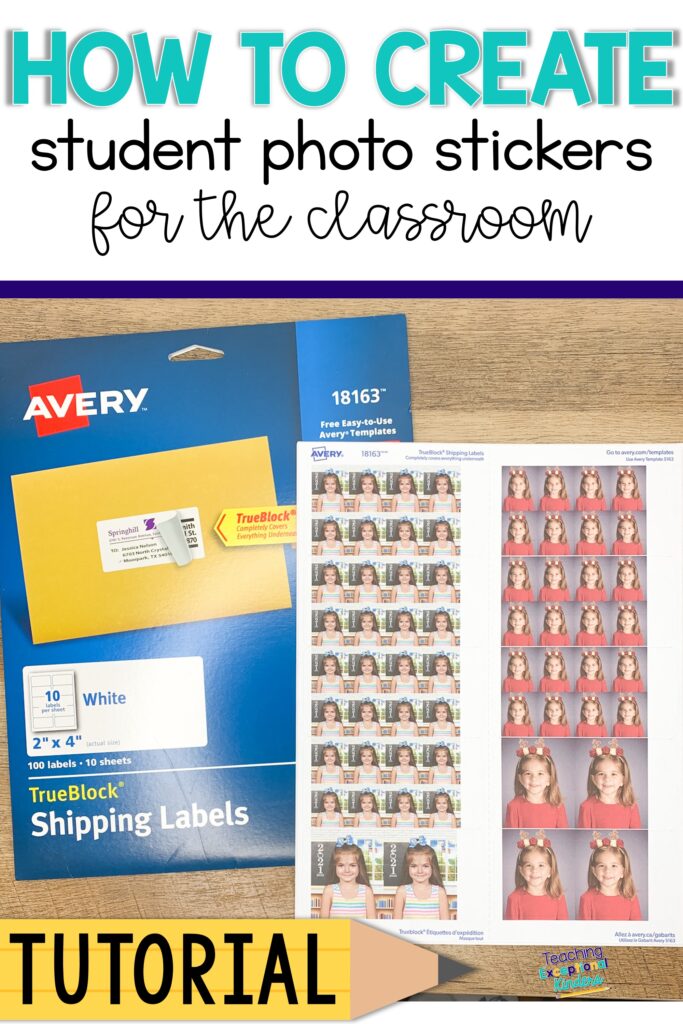
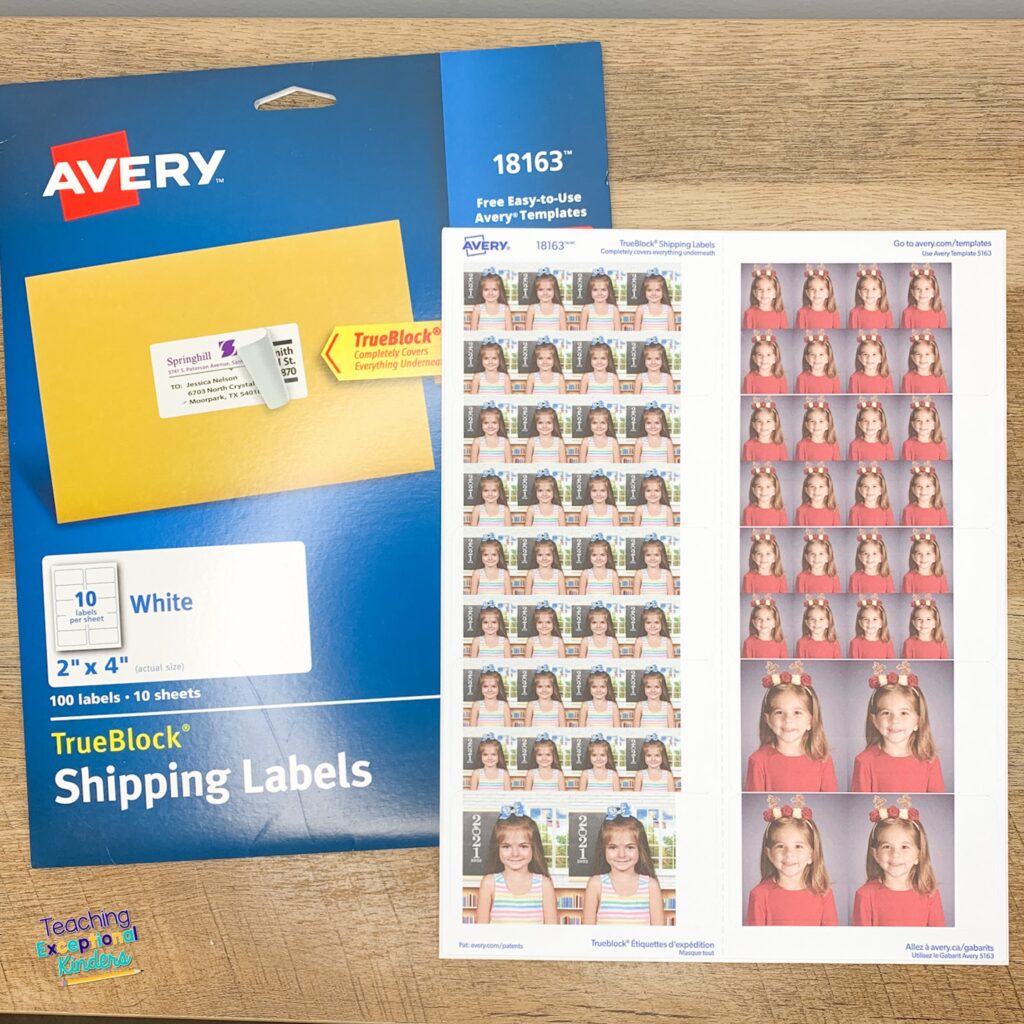
2. Choose what size labels you want to print on. I used these 2 x 4 inch labels from Avery. (Click here for my Amazon affiliate link for labels.)
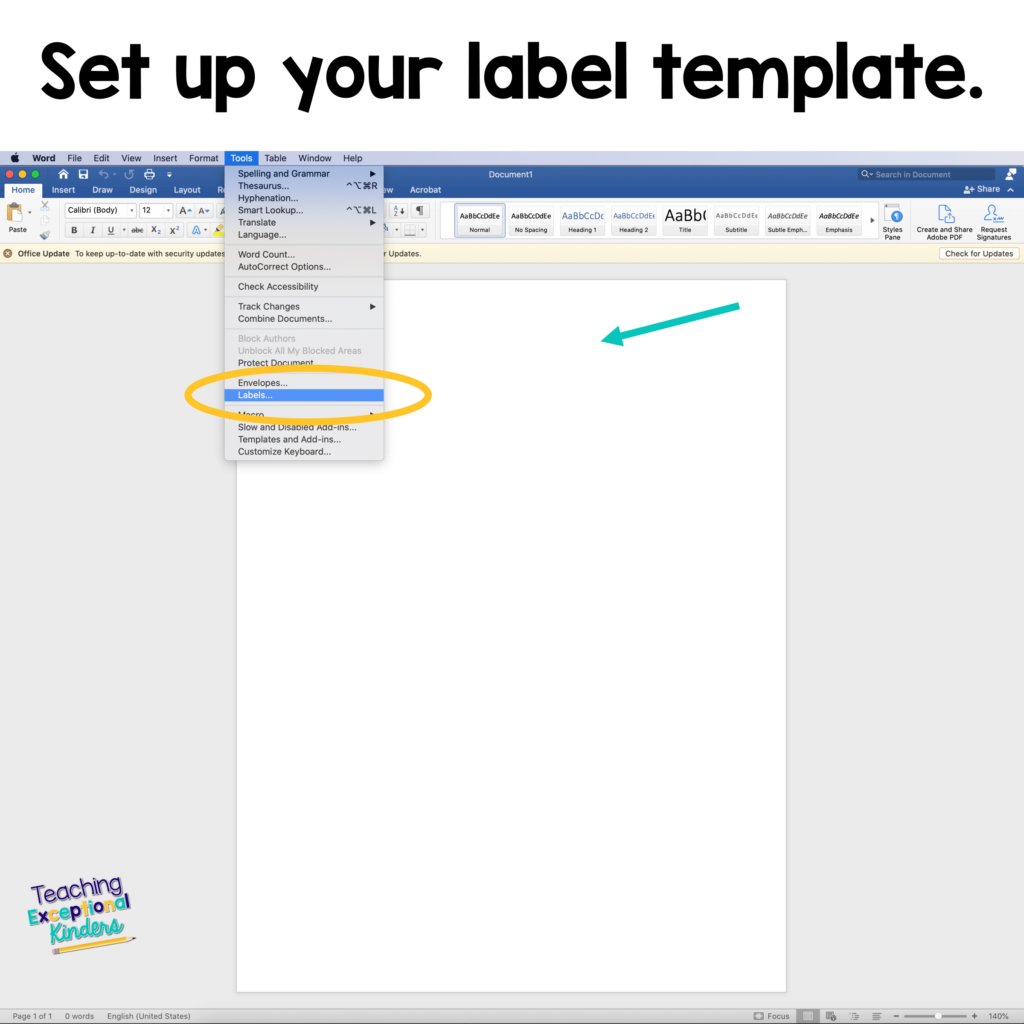

3. Open a blank Word Document and choose tools – labels. You'll need to find and select the label number that matches the labels you chose. The number is usually printed on the front of the label box.
4. Then you'll insert the picture you want to use. On my MAC, I can drag and drop the picture into the document. On a PC, you may need to choose insert-picture and find the picture on your device.
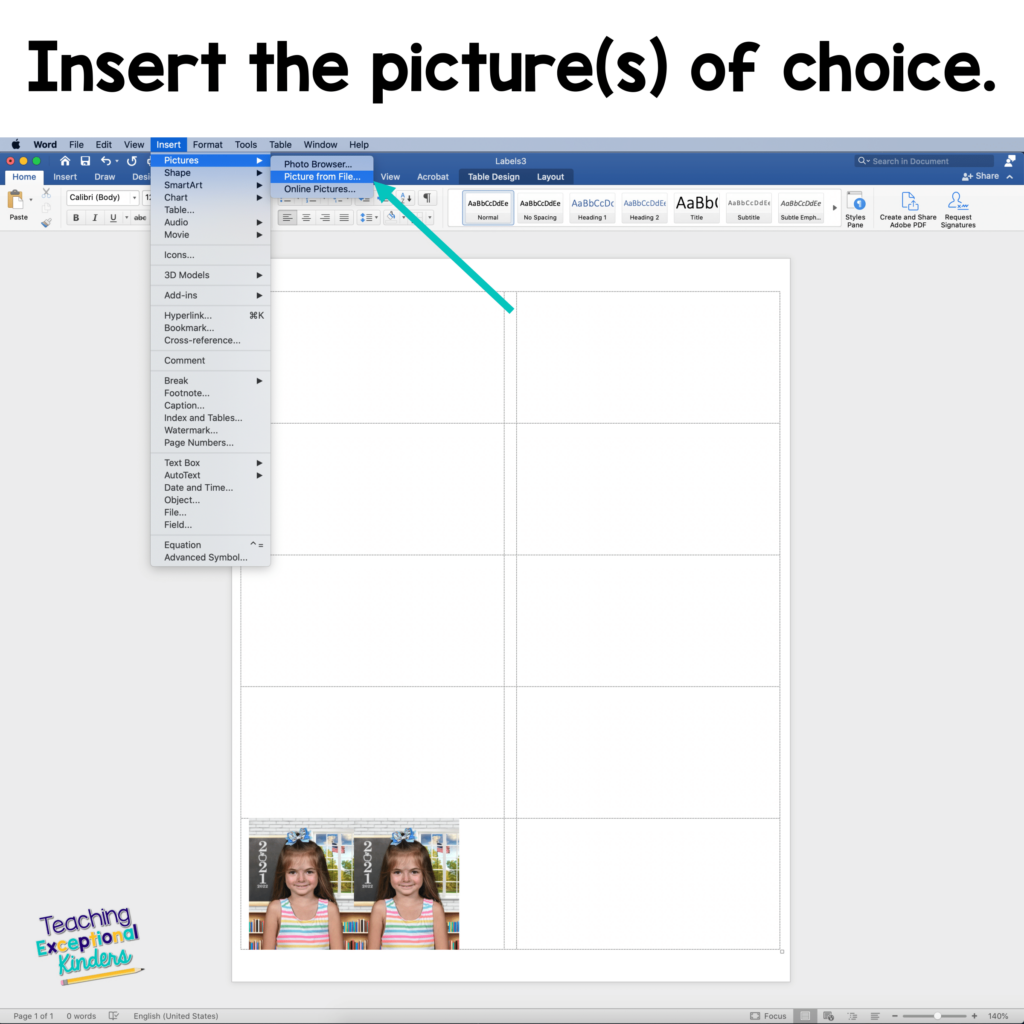

5. You can resize the picture to meet your needs. Then you can copy and paste the picture in the same cell in the table and then as many times as you'd like. I like to print at least 15 pictures per student so I have them available throughout the year.
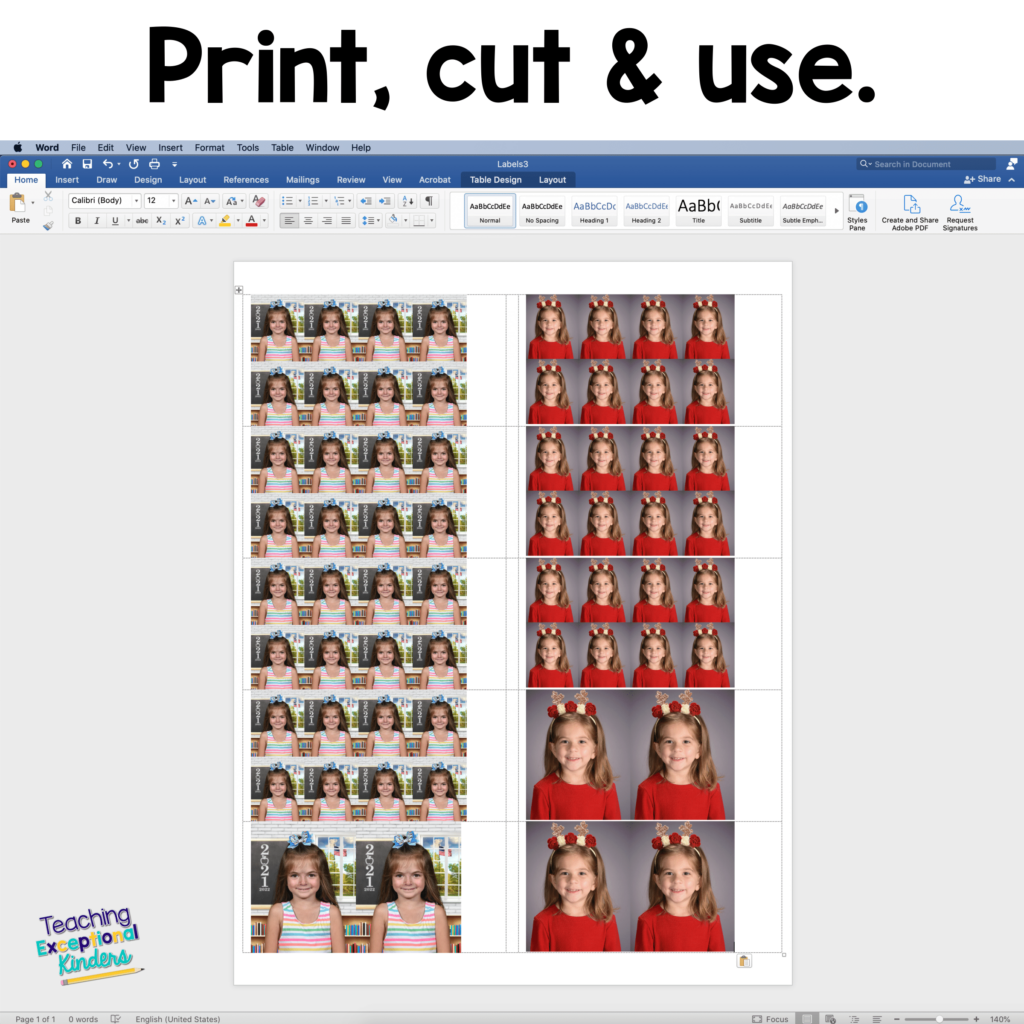
After you have it set up the way you want, you'll print the pictures onto your labels. You'll have to cut them out to fit, but otherwise, they are ready to use.
Now you are all set with student photograph stickers for the school year. Teacher tip: You may want to tape over the stickers with packaging tape when you use them so they don't peel.
Video to Show how to create student photo stickers in a word document
Need more classroom visuals? Click here to read more about using visuals to support the students in your classroom.